Summer is officially here, which means it’s time to gear up for a season of lush gardens and vibrant landscapes. One crucial aspect of ensuring a thriving garden is to prepare your hoses and sprinkler system for the warmer months ahead. By taking a few simple steps, you can guarantee that your grass and flowers get watered, your hose doesn’t leak, and your sprinkler heads work correctly. In this blog post, we’ll walk you through 3 simple ways to get your garden hoses and sprinkler system summer-ready so you can enjoy a flourishing garden all season long.
Step 1: Check your hoses and connections for leaks.
To save yourself some money on your water bill, start your summer prep by giving your garden hoses a thorough inspection. Look for any signs of leaks, cracks, or damage along the length of the hose. Feel for soft spots or bulges that may indicate weak areas prone to bursting. If you notice any issues, don’t worry! It’s often a quick fix. For minor leaks or cracks, you can use hose repair tape or a hose repair kit to seal them up. For more severe damage, it might be time to invest in a new hose. Remember, addressing leaks early not only saves water but also prevents costly replacements down the line.
You should also make sure your hose and spigot connect properly. To make sure everything’s in ship shape, all you have to do is screw the hose in place, turn the water on, and watch to make sure no water sprays out where they connect. If the hose’s connection is at fault, look into getting a new hose. But if the spigot is rusty or damaged in a way that prevents it from fitting with the hose, you may need a plumber to help you replace it.
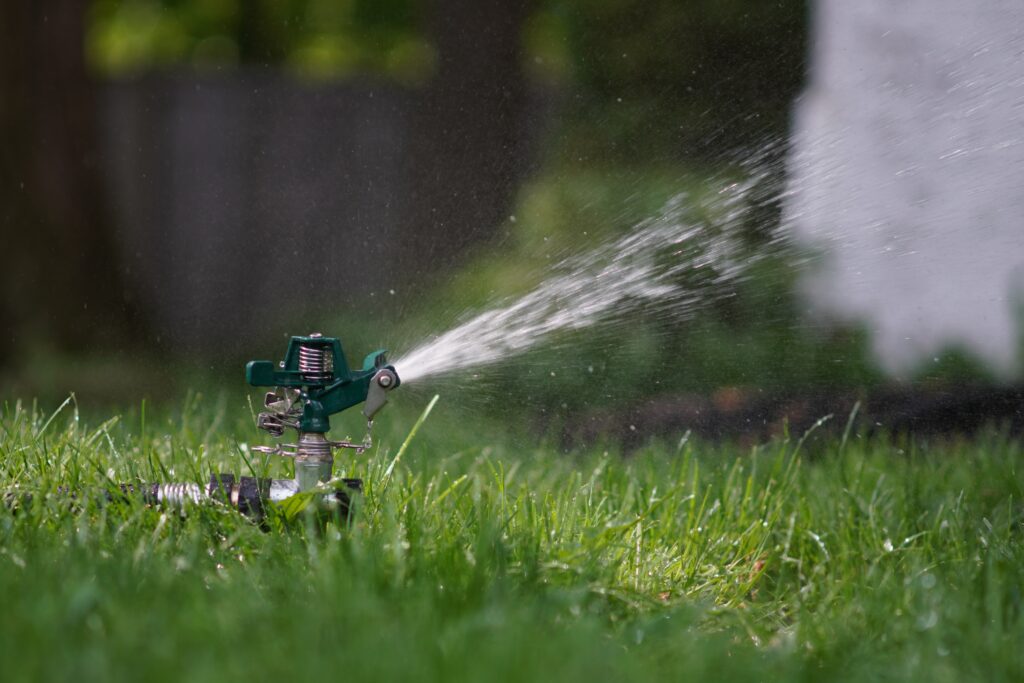
Step 2: Clean and unblock your sprinkler heads.
Over time, dirt, debris, and hard water buildup can accumulate in your sprinkler heads, leading to uneven water distribution and reduced efficiency. Before the summer season begins, take a moment to clean and unblock your sprinkler heads. Start by removing any visible dirt or debris by hand. For stubborn clogs, try using a toothbrush or small wire brush to gently scrub away the buildup. If necessary, soak the sprinkler heads in a vinegar solution overnight to dissolve mineral deposits. This simple maintenance step will ensure a uniform spray pattern and maximize the effectiveness of your lawn-watering system.
Step 3: Check the water pressure and adjust as needed.
Once your hose and sprinklers are all in working order, check your spigot to make sure its water pressure is just right: not too little, and not too much. High pressure can cause damage to your hoses, fittings, and sprinkler heads, while low pressure may result in inadequate watering.
To check the water pressure, you can use a pressure gauge attached to an outdoor faucet. Ideally, the pressure should be between 40 and 50 pounds per square inch (psi). If the pressure exceeds this range, you can install a pressure regulator to maintain a steady flow. On the other hand, if the pressure is too low, consider contacting a plumber from Yoder Plumbing to assess and address the issue.
Keep your lawn green all summer with Yoder Electric!
Preparing your garden hoses and sprinkler system for the summer doesn’t have to be a daunting task. By following these three easy steps—checking for leaks and damage, cleaning your sprinkler heads, and checking the water pressure—you’ll be well on your way to a flourishing garden throughout the season.
Remember, regular maintenance and proactive care are key to preventing costly repairs and conserving water. If you need any assistance or have any questions, don’t hesitate to reach out to our team at Yoder Plumbing. We’re here to help you achieve a thriving and beautiful garden that you can enjoy all summer long.
Contact us today to learn more about who we are and how we can optimize your home’s plumbing system. Happy gardening!